Snapshot Testing with Verify
This post is part of two awesome advent calendar initiatives - the .NET Advent Calendar 2021, and the C# Advent Calendar 2021. Check out both links for awesome community blog posts!
In a recent episode of my podcast (The Unhandled Exception podcast), I was joined by Simon Cropp to chat about a form of testing called snapshot testing - which has completely changed the way I now write my tests!
Simon is the author of the Verify .NET snapshot testing library, and also a maintainer of ApprovalTests, which is also a snapshot testing library.
I'd heard of snapshot testing before, but hadn't really used it. In the week leading up to recording the podcast, I started to play around with it, and have quickly become an avid fan. This is going to save me so much time writing tests, and the more I use it, the more I wonder why this isn't more of a commonly used testing methodology. Most developers I ask, haven't even heard of snapshot testing. I think that's a big mistake, given both how powerful it is, and how much time it can save.
What is snapshot testing?
Simon said near the start of the episode that perhaps the term "snapshot testing" is badly named, and it should instead be called "snapshot assertion". This is because it's the assert part of your test that this relates to.
A simple example...
// Arrange
var sut = new MySystemUnderTest();
// Act
var result = sut.DoSomething();
// Assert
await Verifier.Verify(result);
It's only the last line that relates to snapshot testing. This will serialise result in some form or another (depending on what it is), and write it to disk. This is known as the "received" file - ie. that's the output from the current test execution's verify. This gets compared to another file on disk called the "verified" file. If they're different, then your test fails. If they're the same, then your test passes.
If you're paying attention, you might now be asking what creates that "verified" file in the first place. How does my test ever pass? The answer is - the first time you run it - it will always fail. The act of copying the "received" file as the "verified" file is your way of saying "I approve this version", and this verified version goes into your source control system, alongside your changes. Note that the act of copying the file, sounds very manual - but I haven't yet once had to manually copy that file across, as my diff tool does this for me...
Diff-tool integration
How many times have you had a failing test, where the assertion is comparing JSON, and you've had trouble working out what is different based on badly formatted JSON in the test output window? I quite often end up manually copying and pasting the JSON into vscode so I can format the JSON - then copying both sides into WinMerge to compare.
With Verify, not only do I not have to generate the expected data in the first place (more on that shortly) - I automatically have my diff tool of choice, popup as soon as the test fails, showing me exactly what has changed!
If I'm happy with those changes, I just use my diff tool's UI or keyboard shortcut to copy those changes from left to right, and that's it! The saved right-hand side becomes the new 'truth', which then gets committed to source control alongside my main code changes.
Note that my example above is talking about .NET objects being serialised to JSON. But Verify also works with tons of other content types (eg. images, PDFs, etc) - and it also integrates into tons of other libraries (eg. Playwright, Entity Framework, Blazor, ImageSharp, etc).
Multiple diff tools are supported - and if you have more than one installed, you can configure which ones it should use with the DiffEngine_ToolOrder environment variable.
How much time does this save the developer?
Okay, before we go on - let's stop for a minute and contemplate how much time this actually saves...
A lot of the tests I write are asserting against non-native objects - eg. DTOs or a collection of DTOs. Sometimes they might be nested. So without snapshot testing - I need to manually write code to generate the expected data to assert against. For example...
// Arrange
var expectedData = new List<Order>
{
    new Order()
    {
        PriceNet = 100m,
        PriceGross = 120m,
        OrderItems = new List<OrderItems>
        {
            new OrderItem
            {
                Sku = "test-sku-1"
                ...etc..
            },
            new OrderItem
            {
                Sku = "test-sku-2"
                ...etc..
            },
        }
        ...etc..
    },
    ...etc...

    // yawn! it is hometime yet?
};

var sut = new MySystemUnderTest();

// Act
var result = sut.DoSomeThing();

// Assert
result.Should().BeEquivalentTo(expectedData);
Now let's compare this to Verify...
// Arrange
var sut = new MySystemUnderTest();

// Act
var result = sut.DoSomeThing();

// Assert
await Verifier.Verify(result);
Need I say more? ;)
When you run that Verify test for the first time - it'll pop up your diff tool...
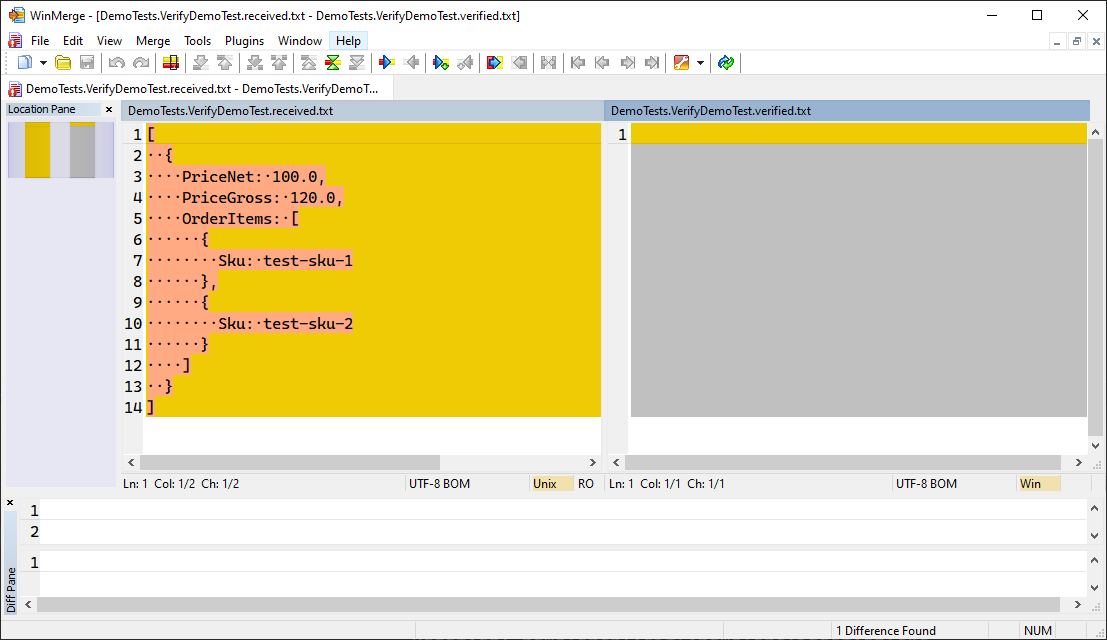
I can review it to make sure it's what I expect. Then I can just use the diff tool's native way of copying from left to right. In WinMerge's case, it's this button...

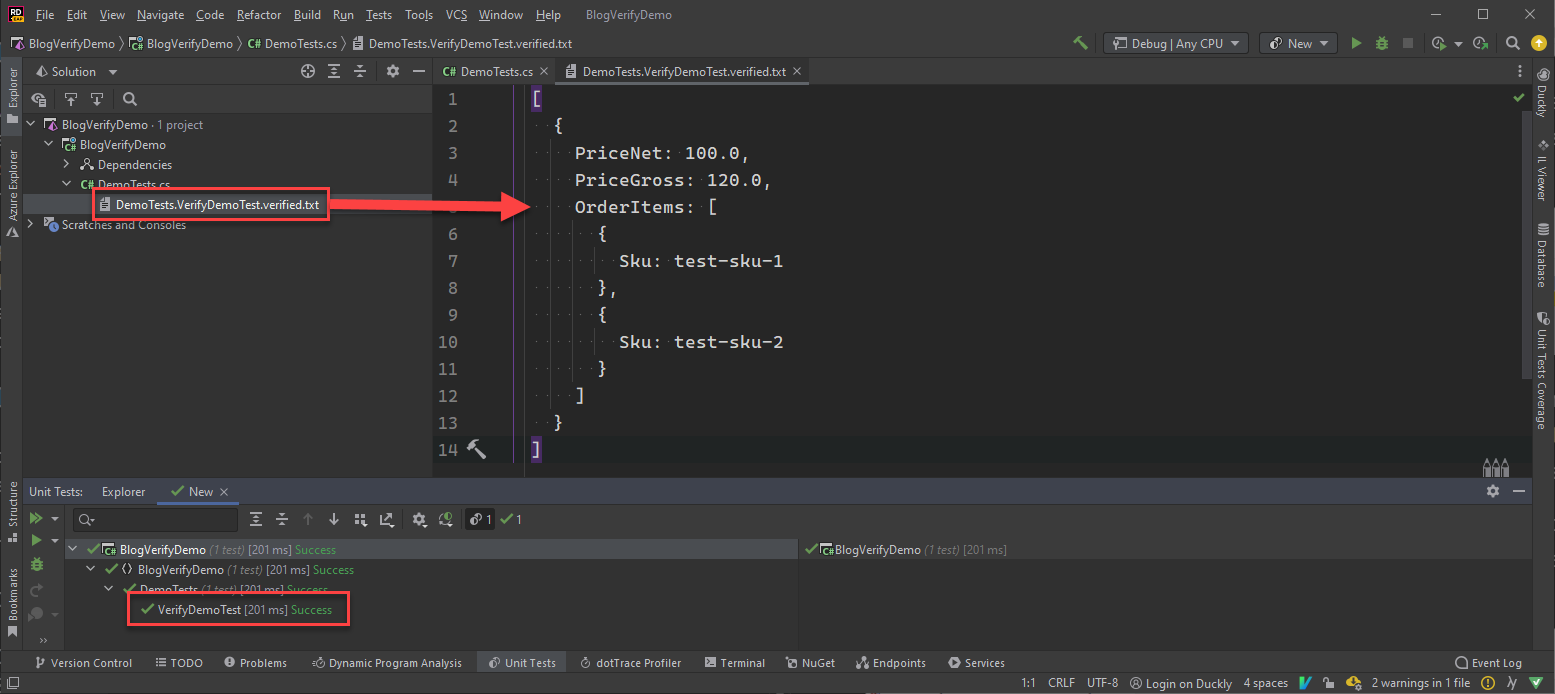
Save the file, and that's it! The test will now pass! You'll also have a new file, in this case, called DemoTests.VerifyDemoTest.verified.txt, that can (and should!) be source controlled alongside your code changes.
A few weeks roll by... and a bug gets introduced in some tax calculation code, which causes the test to fail. When running the failing test locally, it'll automatically pop up your diff tool...
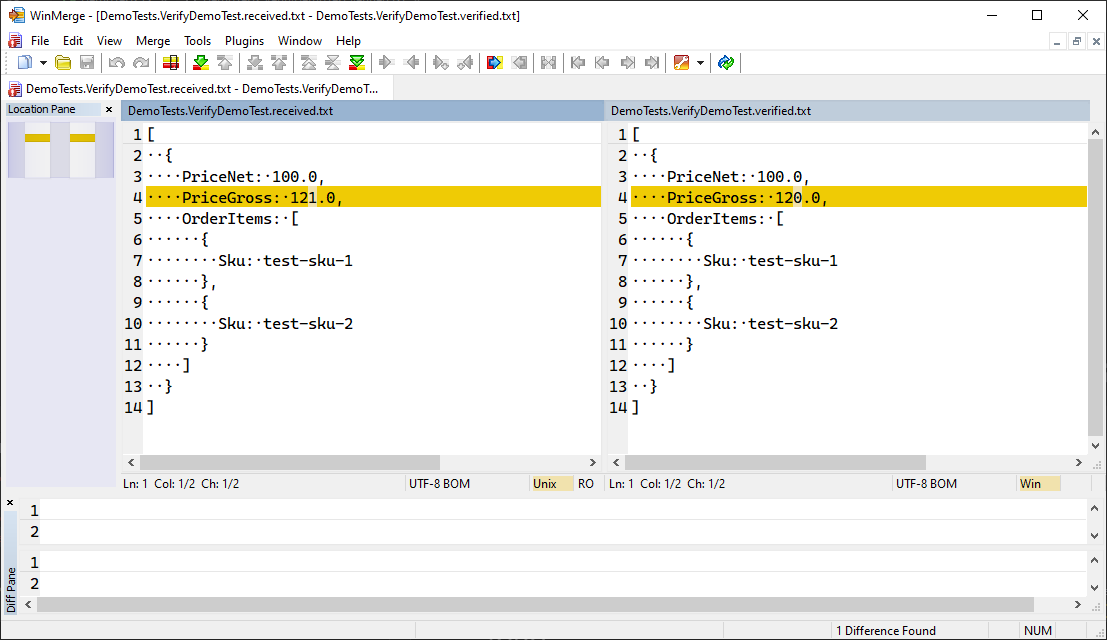
That's so much more clear than messy unformatted JSON in the output window. In the output window - the two sides of the comparison aren't even side by side!
Guids and Timestamps
Sometimes in your test data, you have guids and timestamps that will be different each time your code is run. Verify automatically detects this, and replaces them with DateTime_1..DateTime_n for timestamps, and Guid_1..Guid_n for guids. Where the same GUIDs have the same n value.
{
  Id: Guid_1,
  OtherId: Guid_2
  SomeValueThatIsTheSameGuidAsTheFirstId: Guid_1
}
These are called scrubbers, and you can also write your own too.
DiffEngineTray Tool
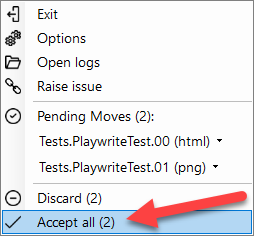
Simon insisted that I really need to be using the DiffEngineTray tool. This is basically a system tray tool (Window only at the moment) that aids you when approving changes - also allowing you to accept in bulk...
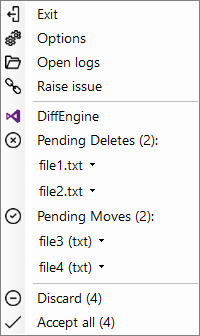
(screenshot taken from the project's readme)
You can install it just by using the dotnet cli...
dotnet tool install -g DiffEngineTrayI must admit, when I was just using Snapshot testing for .NET Objects that get serialised to JSON (as I described above) - I didn't see much use for this. I was quite happy accepting changes in WinMerge. But... playing around a bit further, I'm soon discovering that this is very useful when dealing with other types of files - eg. images or screenshots. Let's delve into an example of this using the Playwright UI testing tool and Verify Playwright extension...
Playing with Playwright
A simple example that just browses to the podcast website, and verifies the results...
public static class Initialisation
{
    [ModuleInitializer]
    public static void Run() => VerifyPlaywright.Enable();
}

[Fact]
public async Task PlaywrightTest()
{
    using var playwright = await Playwright.CreateAsync();
    await using var browser = await playwright.Chromium.LaunchAsync();
    var page = await browser.NewPageAsync();
    await page.GotoAsync("https://unhandledexceptionpodcast.com/");
    await Verifier.Verify(page);
}
The first run of that test, will pop up two instances of my difftool. One with a screenshot...

And another with the HTML...
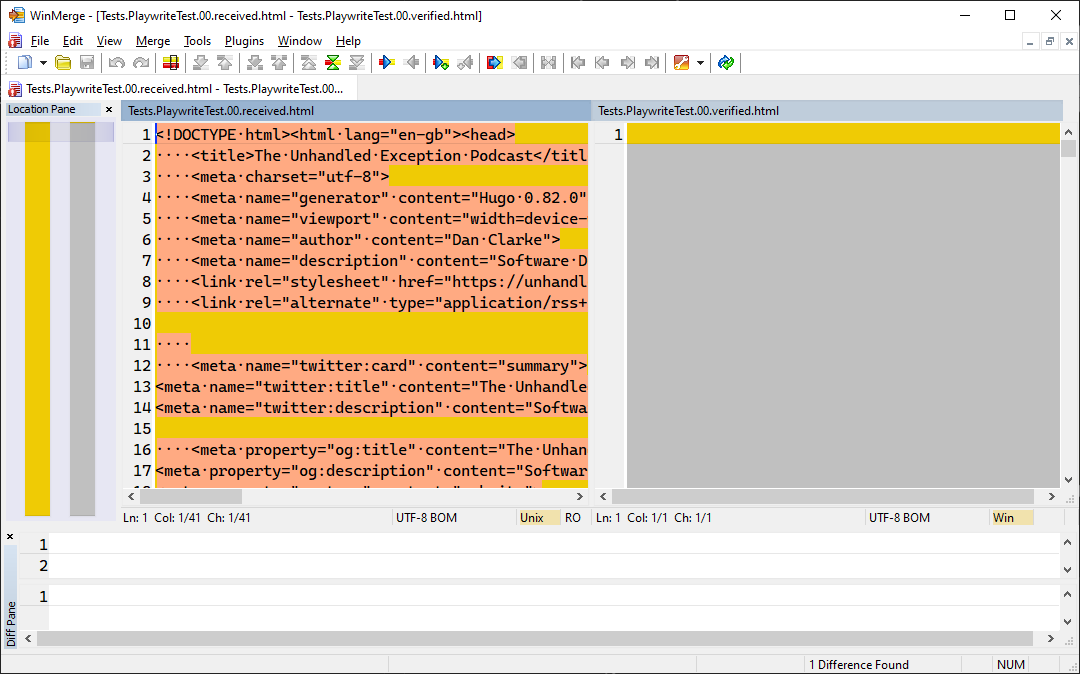
Note that because this is the first run - both the screenshot comparison and the HTML diff are empty on the right.
The point here is that it opened multiple types of diff from a single Verify command against the Playwright page - one for the screenshot, and another for the HTML itself. I can now just right-click on the system tray tool, and choose 'Accept all'...
...and life is green :) ...

Perhaps stop and take a moment to think about how little code is in that Playwright test above - and how much value both Playwright and Verify gave us out of the box. It's very impressive.
Recording
Before wrapping up this post, I just want to cover another pretty awesome thing that Simon discussed in the podcast episode. Whilst the concept of "recording" isn't just limited to Entity Framework and its generated SQL statements - this is something that piqued my interest, so I thought I'd have a play...
[Fact]
public async Task EfTest()
{
    // Arrange

    VerifyEntityFramework.Enable();

    var builder = new DbContextOptionsBuilder<DataContext>();
    builder.UseSqlServer(ConnectionString);
    builder.EnableRecording();
    var db = new DataContext(builder.Options);

    // Act

    EfRecording.StartRecording();

    await db.MyTables.AddAsync(new MyTable { Id = Guid.NewGuid() });
    var count = await db.SaveChangesAsync();

    // Assert

    await Verifier.Verify(count);
}
Which on the first run, gives me this...

That's a super-simple example - but you can see how easy it is to get Verify to generate a snapshot of the SQL that Entity Framework outputs. And other than calling .EnableRecording() on the options builder that gets passed into your DataContext, no changes to your code are required. And bear in mind you'd normally pass this in from your tests anyway - even in an integration test.
A lot of the tests I write are integration tests where I spin up a real database in Docker, and write tests against my APIs themselves (not each individual C# class). Verify is great because I can quickly verify the HTTP response and any data my tests query from the database to ensure the SUT did what was expected. However, thanks to this recording concept - for free with just a couple of lines of code in the test - there's now the added benefit that I can also snapshot any SQL statements that my Entity Framework code has made, so every time it changes, tests fails, and I can review why it's different. Bear in mind that it might not just change because my code has changed... it might change when updating to a new version of Entity Framework. Good to know if a new version of EF has changed your SQL (for better or for worse)!
A swath of extensions!
I've touched on a couple of extensions in this blog post - but there are a ton more. From Blazor verifiers, to ImageSharp! And from speaking to Simon, he's very keen for people to get in touch with use-cases for different extensions. He spoke in the podcast episode about how it was important to him that Verify was composable and extendible from the start. And that's clear in the list of extensions he has.
Summary
The more I look into this and use it - the more I honestly don't understand how this isn't a more widely used way of asserting in tests. It saves a massive amount of time, makes diagnosing failing tests far easier, and fulfils multiple different use-cases and scenarios. It's certainly a tool that has been permanently added to my toolbox moving forward, and I'll now be introducing it to all teams that I consult for.
Comments